AnswerDock allows users to create their own datasets by uploading CSV or Excel files. Typically, these are used to do data analysis on a static dataset exported from another system. Users can however use this method to update their datasets with new data by uploading files to replace or add to an existing dataset.
Before you start, take a look at the guidelines for uploaded files.
Below are the steps needed to upload your CSV or Excel Files:
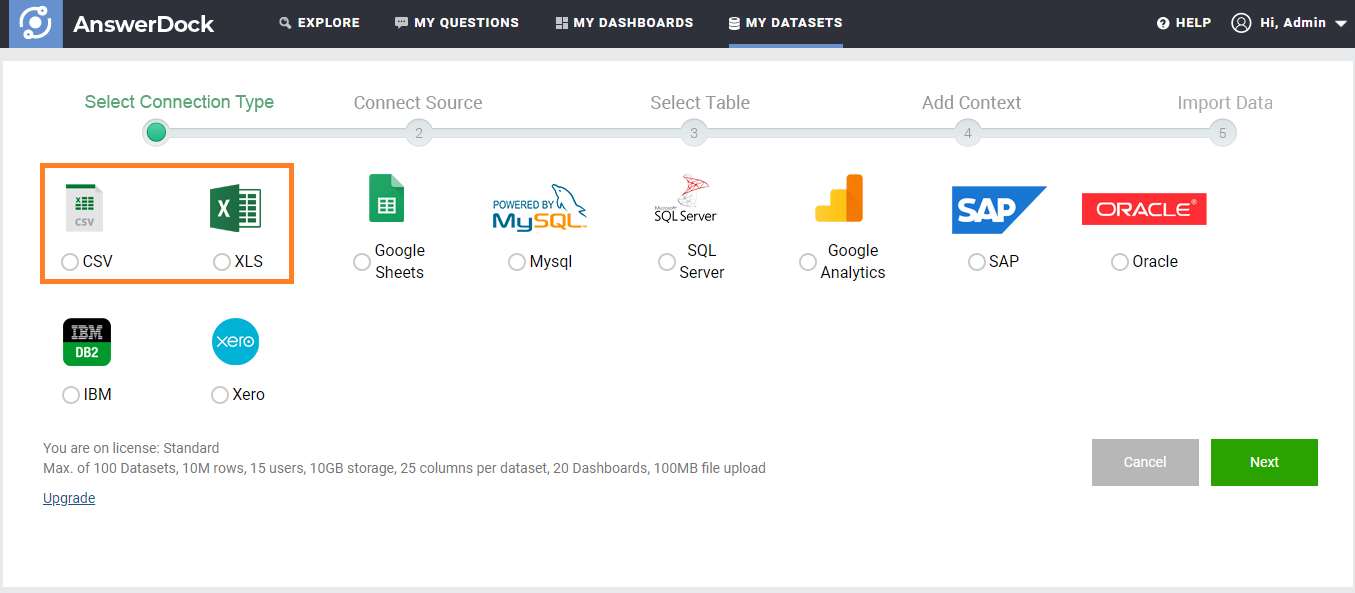
1- Go to My Datasets page by clicking on the link in the header. Then click “+Add New Dataset”.

2- Select CSV or Excel.
3- On the upload page you will have the following options
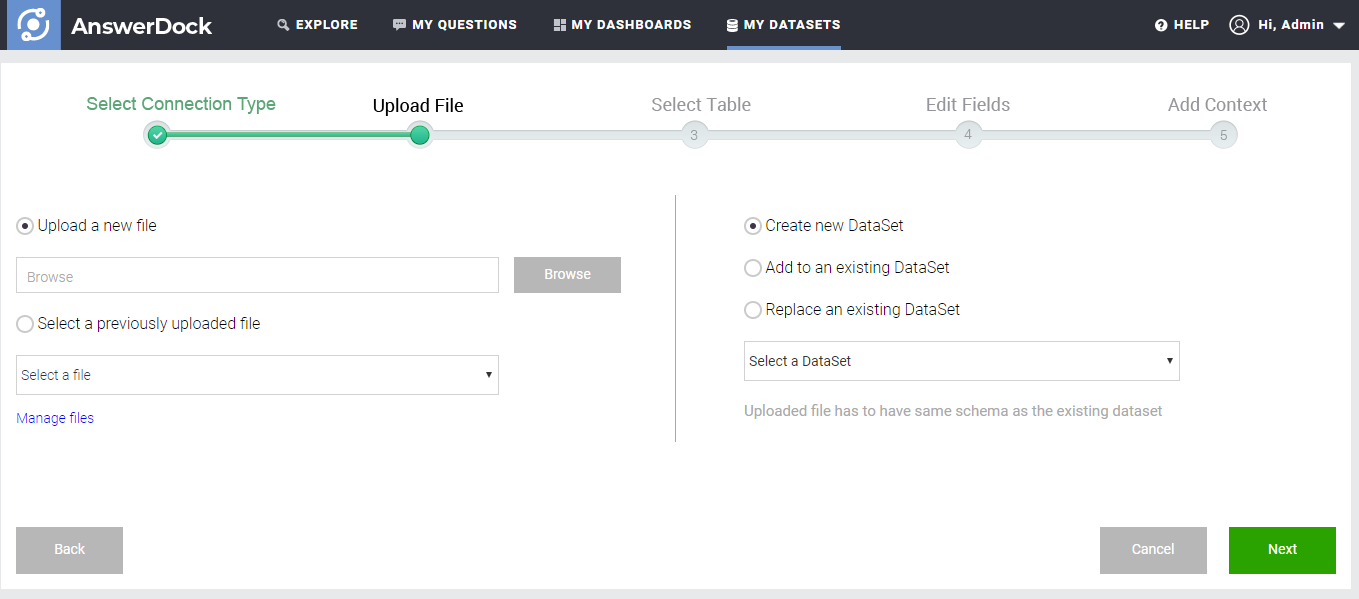
| Option | Explanation |
|---|---|
| Upload a new file | Use this to upload a new csv or excel file. |
| Select a previously uploaded file | Use this to select a file you already uploaded. |
| Create new DataSet | Use this to create a new dataset with a new name. |
| Add to an existing DataSet | Use this to frequently add new data records to your existing dataset. The uploaded data would need to have the same schema as the existing dataset. |
| Replace an existing DataSet | Use this if you need to completely replace a previous dataset with new records.The uploaded data would need to have the same schema as the existing dataset. |
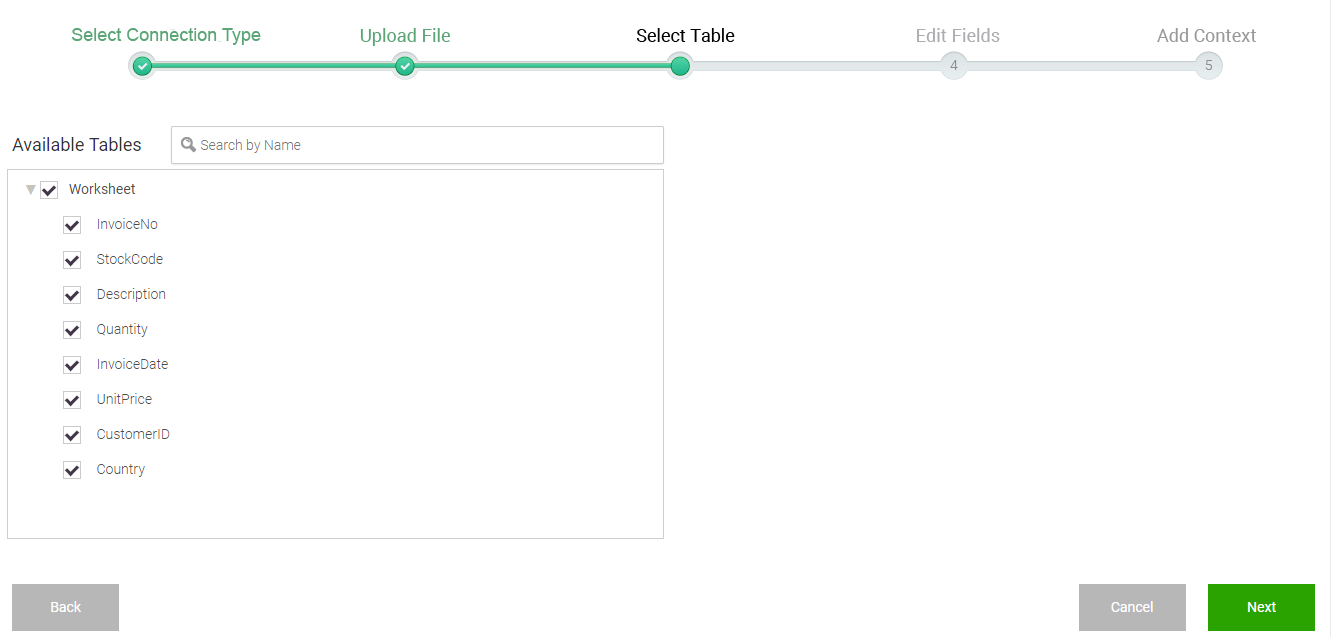
4- After uploading the file and clicking next, AnswerDock will display the list of sheets within your file (for excel files only), and the list of columns in each sheet. Select the sheet and the columns you would like to import, and click next.
5- AnswerDock will start importing the data records. Once data is imported, AnswerDock will start indexing the data and analyzing the columns to detect their data types. Progress of the import will be displayed on the page. Note that this step can take time depending on the number of records and columns you have in your dataset. Once the upload and processing is done, you will be redirected to the Fields Settings Page below:
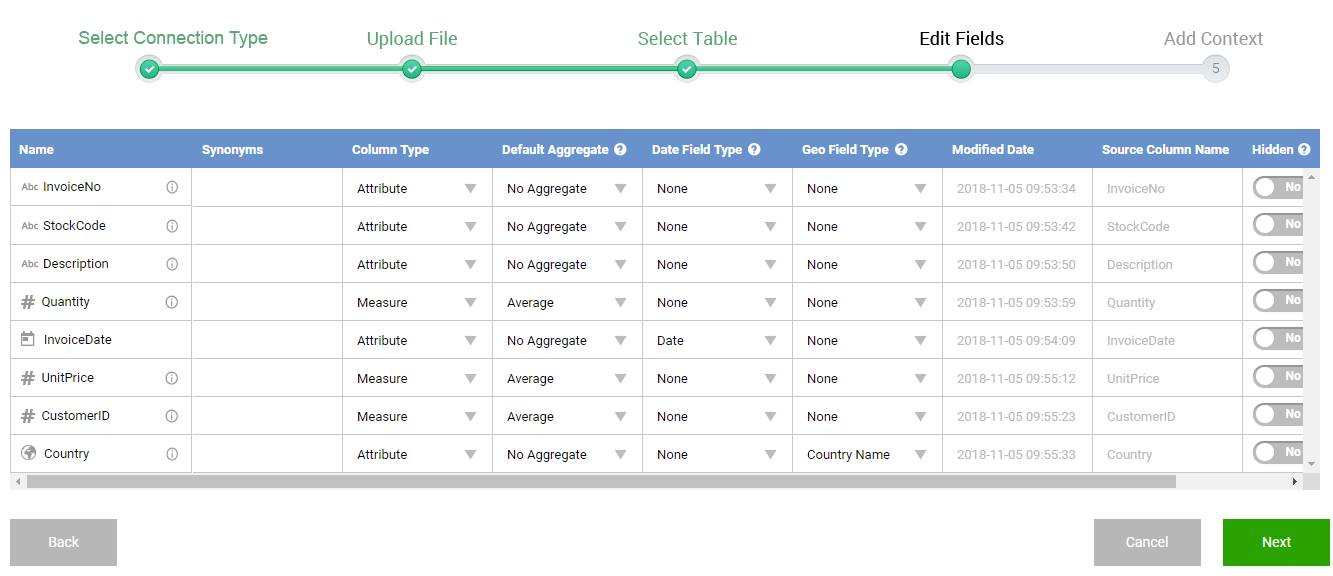
6- Edit any of the column properties. Explanation of the above page is in a separate section of the documentation: Managing Column Properties. Note that AnswerDock will already have detected fields of type date, year, country, country code, among others. Click next to go to the dataset properties page below.
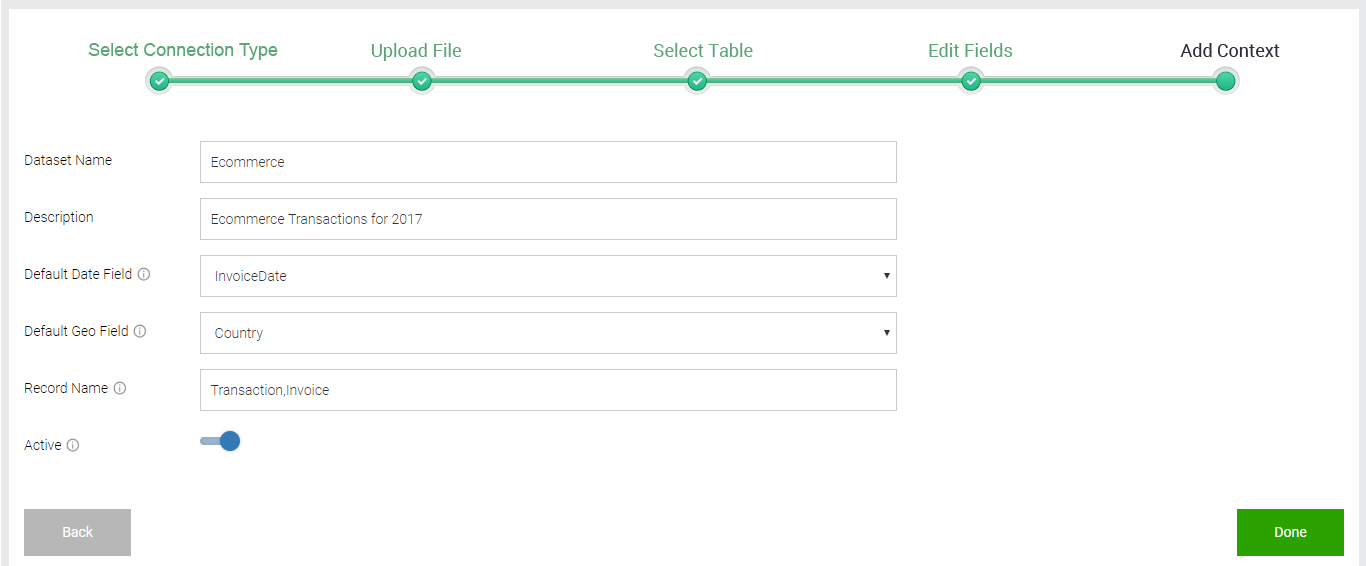
7- Edit the dataset name, description, default date field, default geo fields, records name and dataset status. Explanation of these properties is in a dedicated section of the documentation: Managing Dataset Properties. Once you are done with the properties, click Done.
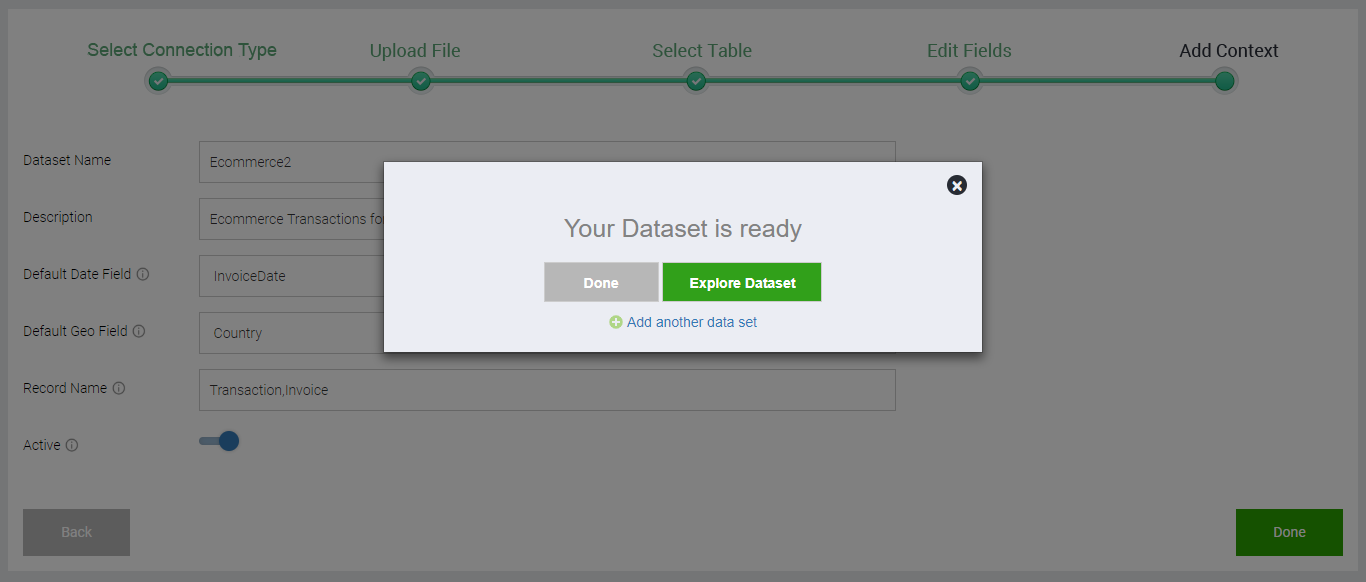
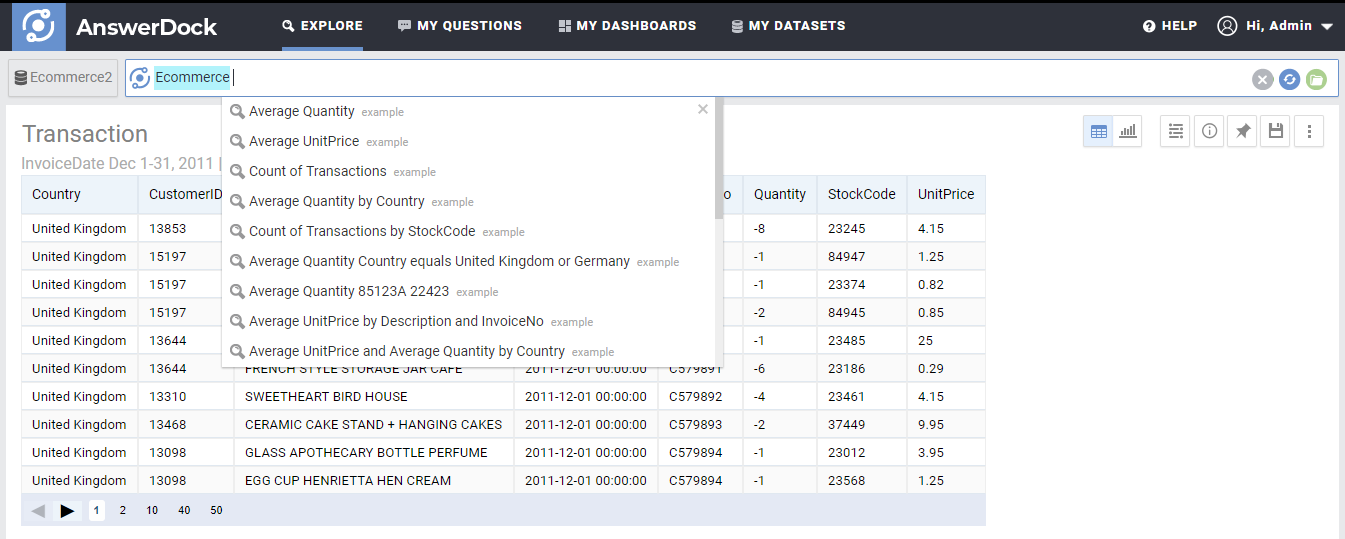
8- Once the AnswerDock finishes setting up your dataset, you can not explore the dataset or add a new one. Clicking Explore Dataset will take you to the explore page and list for you the dataset records, by using the Dataset keyword in the search box. Note that AnswerDock will also show example questions that have been auto generated to get you started with exploring your data.